Infrared, a CEC Injection Alternative
There are solutions in the form of CEC injectors, commonly used in Kodi setups, but they’re like $40 dollars. All you need is an Arduino and IR.
Parts
Software
- Xscreensaver
- Arduino IDE
- Sherriff’s IRRemote library
- Perl
Instruction
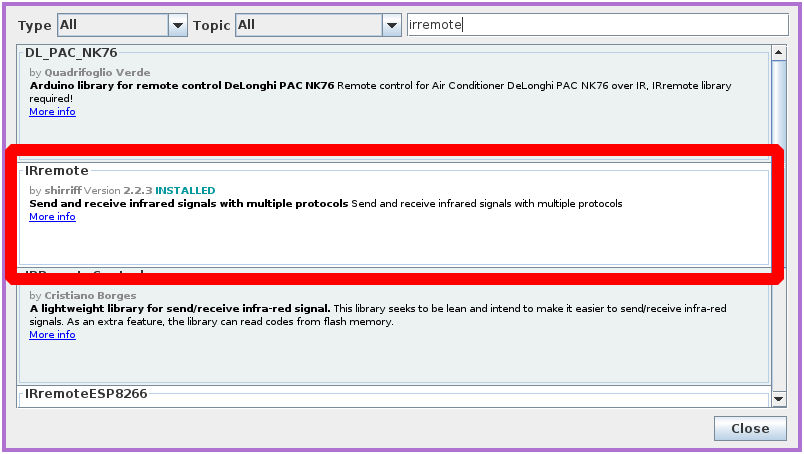
Install Sherriff’s IRRemote library in the Arduino IDE.Ctrl+Shift+I to manage libraries.
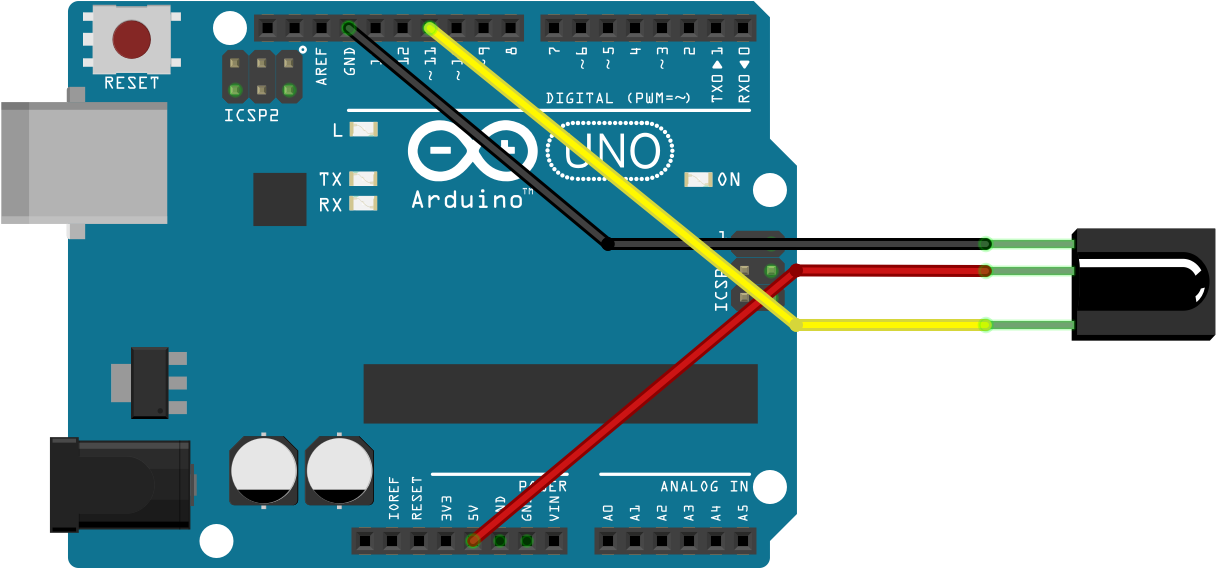
Connect the IR receiver (5v, ground, and data) to capture your remote control’s power signal.
Use Sherriff’s example sketch “IRrecvDumpV2” and upload it. If you used data pin 11, there’s nothing to configure. Just open your serial monitor and check that baud is 9600. Press the power button at the IR receiver with your remote control and you should see the raw signal. Something like:
{9000, 4500, 560, 560, 560, 560, 560, 1690, 560, 560, 560, 560, 560, 560, 560, 560, 560, 560, 560, 1690, 560, 1690, 560, 560, 560, 1690, 560, 1690, 560, 1690, 560, 1690, 560, 1690, 560, 560, 560, 560, 560, 560, 560, 1690, 560, 560, 560, 560, 560, 560, 560, 560, 560, 1690, 560, 1690, 560, 1690, 560, 560, 560, 1690, 560, 1690, 560, 1690, 560, 1690, 560, 39416, 9000, 2210, 560}
You might also want to capture additional functions, like “exit” so you can make that info dialog disappear immediately after turning on. Now you’re ready bury that remote deep in the couch where it belongs and connect the IR transmitter LED to ground and data pin 3 (not optional). A 470 ohm resistor doesn’t hurt.

The following sketch will wait for a “p” character and transmit the power signal. Put your raw signal data where the comments indicate:
IRsend irsend;
int khz = 38; // 38kHz carrier frequency for the NEC protocol
unsigned int irPower[] =  // Your raw power signal here
unsigned int irExit[] =  // Your raw exit signal here
void setup()
{
  Serial.begin(9600);
}
void loop() {
  char incomingCharacter = Serial.read();
  switch (incomingCharacter) {
    case 'p':
      irsend.sendRaw(irPower, sizeof(irPower) / sizeof(irPower[0]), khz);
      delay(2000);
      irsend.sendRaw(irExit, sizeof(irExit) / sizeof(irExit[0]), khz);
      break;
  }
}
Upload and test by sending a “p” in the serial monitor. If your LED is positioned correctly, your screen should turn on or off. The last step is to run a script that makes a serial connection to tell the Arduino when you want it to send the power signal. There are a myriad of ways to accomplish this. I stole and modified a Perl script from the xscreensaver-command documentation:
#!/usr/bin/perl
system "stty -F /dev/ttyUSB0 raw ispeed 9600 ospeed 9600 cs8 -ignpar -cstopb -echo";
system "cat < /dev/ttyUSB0 > /dev/null &";
$blanked = 0;
 open (IN, "xscreensaver-command -watch |");
 while (<IN>) {
     if (m/^(BLANK|LOCK)/) {
         if (!$blanked) {
             system "echo -n p  > /dev/ttyUSB0";
             $blanked = 1;
         }
     } elsif (m/^UNBLANK/) {
         system "echo -n p  > /dev/ttyUSB0";
         $blanked = 0;
     }
 }
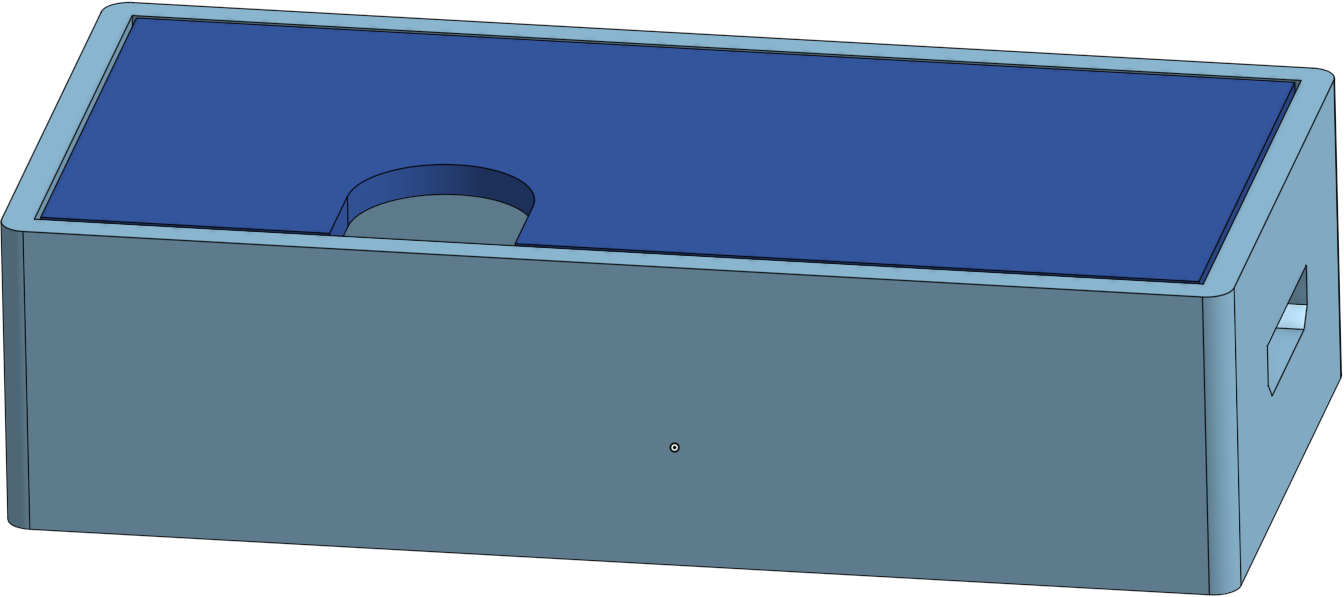
The script provides for different actions on “BLANK” and “UNBLANK”, but in my case it does the same thing. Attached below is a basic enclosure if you happen to be using the same Arduino clone I had.